SCIM Integration Guide
- Login into Azure Portal, Find and go to Microsoft Entra ID service
- Click on Enterprise Application → New Application → Create Your Own application
- Name the application something recognizable such as AppSecEngineer-SCIM, select the Non-gallery option and click on create
4. Once Application has been created, you'll find the following view, from the left navigation menu, select provisioning
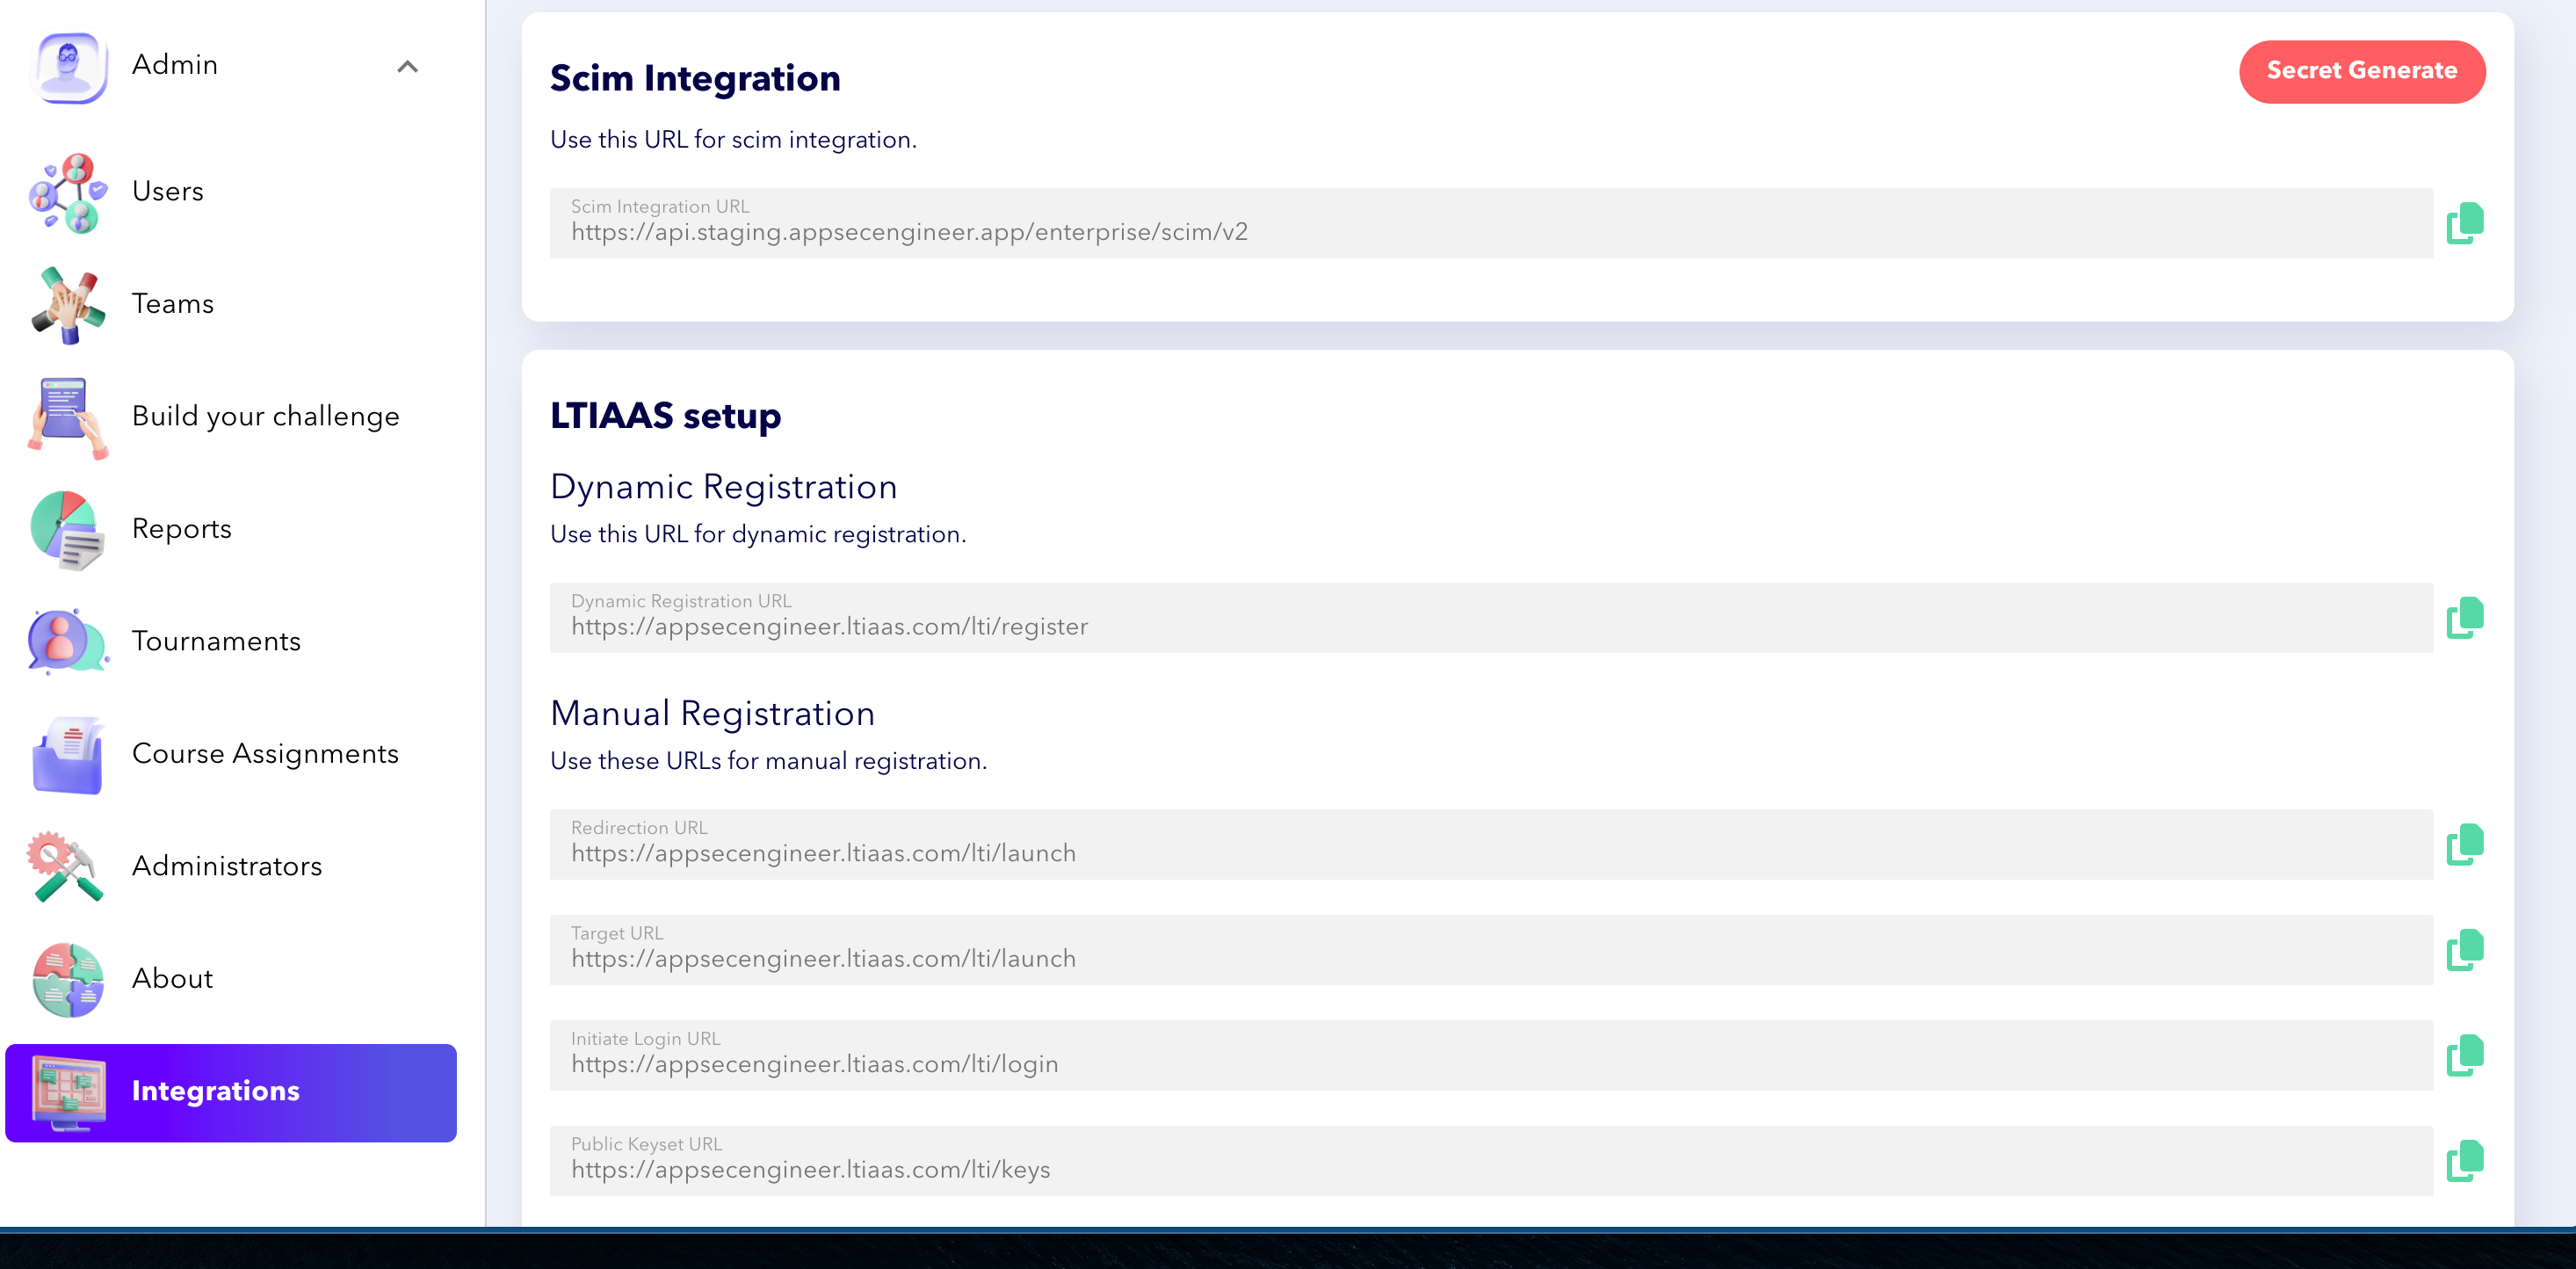
5. In a separate tab, login to the AppSecEngineer portal, select "Admin login".
Navigate to the sidebar menu, open the admin dropdown. Click on "Integrations".
In the integrations section, note the SCIM integration URL and generate a SCIM secret.
 Interface showing SCIM Integration URL and LTIAAS setup sections for dynamic and manual registration. Left menu includes Admin, Users, Teams, Reports, and Integrations.
Navigate to the sidebar menu, open the admin dropdown. Click on "Integrations".
In the integrations section, note the SCIM integration URL and generate a SCIM secret.
6. Go back to the Azure Portal tab, Click on provisioning and you should be able to see the following view.
Click on "Connect your application"
 Interface for application provisioning setup, outlining steps like configuration creation, optional scoping filters, and attribute mapping. Features a sidebar menu with options such as Overview, Provisioning, and Monitor, alongside a notice about the new user experience launching in January 2025.
7. In the "New Provisioning Configuration" page:
Enter the noted SCIM url into the Tenant url field.
Click on "Connect your application"
7. In the "New Provisioning Configuration" page:
Enter the noted SCIM url into the Tenant url field.
Enter the SCIM secret into the secret token field.
8. Click on "
Test Connection": you should receive a notification that connection is successful. Click on "
Create" to save the configuration.9. After saving the configuration, click on "
Start Provisioning"10. Click on "
Provisioning" from the left menuSelect the provisioning mode: "Automatic".
Turn on the
Provisioning Status and press save.The SCIM setup is complete!
Combine SCIM with SSO for seamless user authentication, as shown in our guide on Integrating SSO (Single Sign-On)
All the users and groups assigned to this application will sync with your AppSecEngineer dashboard.
Combine SCIM with SSO for seamless user authentication, as shown in our guide on Integrating SSO (Single Sign-On)
All the users and groups assigned to this application will sync with your AppSecEngineer dashboard.
Related Articles
Integrating SSO (Single Sign-On)
Pre-Requisites Ensure your organization uses a SAML v2.0 compliant IdP. Decide whether to enable SCIM (System for Cross-domain Identity Management) for real-time user provisioning (optional). Step 1: Enable SSO for Your Account Contact the ...SSO Setup with Okta for AppSecEngineer: A Step-by-Step Guide
Follow these steps to configure Single Sign-On (SSO) with Okta using SAML 2.0 integration for AppSecEngineer. Step 1: Sign in to Okta Admin Panel Log in to your Okta Admin account. Navigate to Applications → Click Create App Integration. The image ...Integrate LTIAAS
Prerequisites: An active enterprise plan with AppSecEngineer Access to moodle with same email address as registered admin on ASE platform Note: There is no data synchronization LTI 1.3 Integration: Allows enterprises to pull training content ...Moodle Integration
Step 1: Log in to Moodle Sign in to your Moodle account. Screenshot of the Sandbox 4.5 platform's top navigation bar with options for Home, Dashboard, My Courses, and Site Administration. Click on Site Administration in the top menu bar. Screenshot ...Enterprise API integration guide
We provide most of the reports that are present in our dashboard as APIs which can be integrated into your own system/Business Intelligence tools or some other Dashboards/systems, which will provide insights and help track progress on your own ...